Friday, 18 August 2017

Paperartsy Topic 11

Long time no blog!
 
Very sorry about that, been a tad busy.
 
So, a few of you may have picked up on the fact we've had some building work done, it began on the 18th January 2017 and ended the middle of   May 'ish'. How ever, the redecorating is taking a little while longer. As with all builds little snags rear up and then because the builders have moved on the next job it's a bit of a mare getting them to come back and sort those pesky snags out.
We now only have one "Snag" outstanding, Yeah!
 Upstairs spare room was painted Wednesday and Carpet for Master bedroom and spare room is coming a week on Thursday. Upstairs will then be complete. Downstairs next, no holidays for us this year.

Boring stuff over, back to the fun stuff.
Paperartsy have had a new challenge on for the past 2 weeks, Books. Check out their blog post here.
I like to make a book occasionally, I love the example by Megan Winn of a small leather book with a key to act as a fastener and having finished painting another room, I had a need to make something. That something being the in the form of a book that can double up as a record of what paint colours were used in which room, excellent idea.
What to use to create a base?
 
What better than a paint sample booklet (I have lots). One appealed to me particularly it's size, shape and quality of the booklet. I chose to use the text side instead of colour swatch side.
 
I began by putting holes in concertina valleys of the card, one in the middle and one either end approximately 1" from the edges. An extra hole was punched in the middle of the top ridge on either of the ends too. Torn ledger papers were glued randomly on the visible side of soon to be book. The edges were then stitched with old faithful-the sewing machine.
 
You can just about see the holes for stitching in the valley folds and the top peaks on the two ends.
 

The next bit gets a bit confusing to explain as I used a combination of binding stitches (there are lots on the internet which show you exactly how to do it step by step and one link is on the Paperartsy link above). You don't really want my version it will just put you off book binding for life. Binding complete I got out old faithful and sewed the front and back flaps down which helps secure the fastening ribbon.
 
Here you can see the flaps sticking up like wings prior to being stitched.
 

In this picture the flaps are folded in ready fro stitching.


White gesso was then smeared over the pages using my finger, this dried almost instantly and further colours were added in the same way.
I didn't want to overpower the covers and so kept them simple with only a few additions of circles and mark making with a  regular pencil and stabilo pencil.
A house was stamped on book paper and coloured with watercolour pencils, this was cut out along with a couple of clouds and a few words then glued into position.
A stabilo pencil was used to add outlines to the words circles and other bits, a water pen was used to dissolve the stabilo pencil.
 
Sorry no pics, I'm a little out of practice.
 
 
At this point the sari ribbon used to bind the book was white chiffon and looked a bit boring, I altered this by colouring it with distress ink pickled raspberry, along with my fingers.
 Mission Complete. One paint record book, just got to fill it in now.


Now the hard part linking it to the Paperartsy site, wish me luck.


Sue X


Thursday, 23 March 2017

MDF Driftwood Circle

So here we are again, it's been a little while due to on going house alterations. Don't ask!
Anyone seen a film called Money Pit with Tom Hanks. LOL
 Anyhow, I've managed to squeeze this little number out for a class I'm running at Sunrise Crafts at their new home in Wordsley, Stourbridge, on Saturday April 8th 2017.
Using an MDF Driftwood Circle the large one out of a pack of two.

 
To begin I didn't want the project to be too big and bulky, so instead of using the backing strips I created a backing from thick A4 card.

 
The MDF Circle was placed on the card and drawn around, this was cut out a few millimetres inside the draw line (it wasn't a full circle as  A4 card wasn't the same width, which was fine as it went down the centre to give support). Also added a little later were a couple of coffee stirrers to add a little more support, still slimline though.
 
Next came the initial layer of  brown paint on the right side, this was applied with a brayer and gave a nice even layer which dried quickly. Vaseline was streaked onto the brown paint from the edges inwards to act as a resist for the paint. A mixture of cream and white was brayered over the brown and left to dry, the excess paint and vaseline was removed using a baby wipe.

 
  The Vaseline was reapplied covering some of the brown and some some of the White/cream combination, the next layer was white and blue. Again this was left to dry and removed with a wipe, this produced a distress driftwood effect. 

 
Random stamping was added using chicken wire stamp, text and wall effect then set aside to dry.
Two holes were put in the MDF to make a hanger later.

Now to the decoration, the fence was created first by stamping on tissue paper, this was then flipped over onto the wrong side and coloured with paint then dried gently with a heat tool.


 Once dry the tissue was torn closely to the fence and arranged onto the MDF, painted side down to show the stamped image on right side. A layer of decoupage glue was spread onto the MDF, followed by the tissue paper stamped image. This was gently smoothed into the glue, a good dollop of the glue was gently rubbed over the top to help dissolve the tissue paper and leave the stamped/painted image.

 
They house was next, 4 pieces of card were cut to the same size. Each piece was a different colour.  First, cream/white. Second, white/blue. Third, blue and finally Yellow Ocre.
Once dry they were each stamped with the same house image, using the lighter tone as a base, Windows and doors etc were cut from the coloured images to create a decopatch house.
Ooops moment forgot to take pictures.

 
The elements were distressed around the edges before being glued into position onto the house, the house was also edged with distress ink then sealed with distress wax.
Next up, the tree. Five pieces of card, two painted brown and three green all stamped with the tree image.

 
The brown tree trunks were cut out, ignoring where the green leaves should be.
The green card had additional stamping in green to add interest then the leaves were cut out and glued to the tree trunks. Brown distress ink was applied to the edges to take away the harsh white of cut edges.


Home sweet home was stamped on white card and cut out, a pencil was used to add a touch of colour and distress ink used to darken the edges.  This was layered onto a further piece of white card and lightly coloured in brown to blend in with the project.
All the elements were glued into position and a further addition of green paint around the bottom edges of the house and trees.
Finishing touch was a twisted piece of wire and ribbon threaded through holes to create a hanger.


Hope you like this latest project.

Sue X


Wednesday, 22 February 2017

Wanderlust week 4 - 6

 
Week 4 - activities, not allowed to share part of it as it is a year long challenge.
 
What I can share is a Journal page using 3 colours with as much black white and grey as you want, written prompt was, "I am ready.......". 
 
 
Week 5 - There is no final. basically this was an exercise in putting down a single or double layer as a base on several pages to return to at a later date, Ummm not much to show there I'm afraid.
 
Week 6 - Amanda Grace, The Love letter. This for me is a work in progress as its not my cup a tea. I get the layers and texture, but opening up your inner most thoughts is well, not me.
 
If you would like to check out her blog you can find it here.
 
Sue X
 

Wanderlust Week 7

Week 7 on wanderlust is the turn of Clair Bremner, check out her blog here.  Also, its not to late to join in Wanderlust check it out here if you fancy experiencing a range artistic experiences.
 
If you visit Clair's blog check out the workshops section, there is a free video showing her process.
 
This was my first effort and was/is very addictive,  if  you use the right brushes for the different techniques life is a lot easier too.
 
This was done on a canvas board.
 
 
This was  my second done in my journal.

 
Hope you like them.
 
Sue X


Wanderlust Week 3 - Parts 2 +3

The aim of part 2+3 was to use printed  copies of the ink draw and coloured in versions to create a further couple of pages.
 
I had to wait for a delivery of printer ink before I could complete this so in the meantime had a another go at drawing, this time completely free hand definitely no pencil guide lines.
 
This is my second inked version.
 
 
(Yet to colour this one.)
 
This one was a colour copy of the original, cut out twice and glued to journal page then enhanced with a variety of gelatos'  and other media.
 
 
This version was a photo copy of the inked uncoloured picture to which different colours were used.


Sue X


Extention Part 2

Well here we are a few weeks on and left over winds from storm Doris about to hit. Wouldn't you know it we have half a roof attached and well I guess by tomorrow we may not have a roof at all.
 
Here are some photos so far.


I Came home one day to see Tom checking up on the build quality.
 
 
This is how we look today, the builders arrived at 9.00am checked for leaks (which there were in our bedroom). They promptly covered them over, I guess with more plastic sheeting then were gone by 9.10am  Ummmm, me thinks they have another job on too. Now you see them and now you don't.


Lets see what happens in the storm tomorrow.

And this one was just for fun, the cat went out this morning in the dry a few minutes later she returned and sat on the step. It obviously began to rain and well she didn't move until I let her back in. This is what remained.
 
 
Sue X
 
ps. will try and post some more crafty stuff soon.
 

Wednesday, 25 January 2017

Tuesday Fun January 2017

The builders weren't on site yesterday and so I decided to have a bit of crafting time with the sister-in-law. 
 
Last week Nola and I popped to a local craft shop and collect a few supplies, we came back with an MDF window shape to decorate.

In my true style I didn't take many photos, ooops!
 
At this point we had sandwiched cheesecloth between the 2 pieces of shaped MDF, Structure medium was used to glue the fabric into folds to give the impression of curtains and the 2 MDF shapes were glued together.
 
 
Using a brayer, we added colour to all the MDF, covering the bottom lip if MDF which fit into the gap.

 
A layer of crackle glaze was followed by a coat of lighter chalk paint to give the window a distressed look. Distress ink was added to age even further. Water was misted onto the frame and lifted off to reveal a mottled effect, this was sealed with distress glaze/wax.

 
Close up!


To complete the project the window was slotted into the base and glued into position.
The fabric was painted in a light blue and white left to dry then dry brushed over the top with a darker blue.
The fairy was created from black texture paste on acetate which had been put through a stencil left to dry and cut out. The whole project was then assembled with moss and shop bought flowers and beads. However I think it needs something else!
 
Here is the finished piece!
 
 
That's it for today.
 
Sue X


Tuesday, 24 January 2017

Extention Part 1

 
Why Oh Why didn't we just move house!
 
Half of our lovely conservatory has been demolished.
 
 
Along with the garage.


Just waiting for the building inspector to check out the foundation holes before the next step.
 
Sue X


Wanderlust 2017-Week 3

Wanderlust Week 3 with Wilna Furstenberg was an experience in drawing directly to paper with acrylic  ink.
 
Yeah I can do that, not done it before but I'll give it a go. 
 
Normally I lightly draw with a pencil and then go over it with the chosen medium.
I have to admit I did pencil in a few flowers to go over, as I wasn't relaxed enough to go full hog straight off, however once I got into the flow there was no stopping me.


Acrylic paint was used to colour the pages, magenta, primary yellow, white followed by sap green and brown, all were mixed to achieve different combinations of shades and tones.


 The swirl was added to use up the excess magenta and white, I decided to keep it as a feature and incorporate an arty quote, love the idea of journaling on a page but its not really me. Black was added to make the colours pop, although at one point I thought is resembled a pattern found on a barge.
 
 
I chose the least soppy arty type words I could find on the internet to go in my swirl, then as I sat posting this I  thought OMG I have sunflowers on my page and totally obliviously added a quote by Vincent Van Gogh.
 
This is how the first part of my project turned out, white/black ink/paint was used to add detail to highlight and draw the eye into the page.
 
I'm unable to complete the 2nd and 3rd part this weeks lesson as the printer is out of ink, mainly due to number one daughter printing off several photos for observation support  for an art project.
 
Say no more!
 
Hope you like it.
 
Sue X


Thursday, 19 January 2017

Wanderlust Week 2 - Making Magic

Making Magic!
 
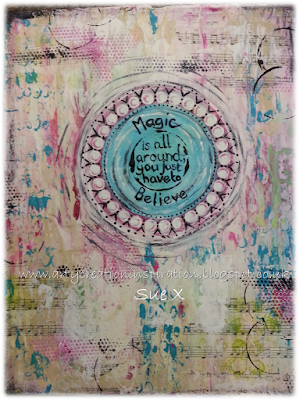
The aim of this weeks Wanderlust class was to let go, paint without inhibitions, not over think the process and continue building layers/texture until the picture reveals itself to you. The reveal being the magic, scary thought as I normally go with, "Stop before you over do it".
 
 I  watched the video and thought to myself, ok, I can do this.
 It was an extremely long recording showing many layers until the artist was happy/satisfied with the result. Having experienced the process of getting lost in the layers I now understand why the video is so long,  I began on the evening of Friday 13th and have only just finished it today, Thursday 19th.
 
 I began with paint/texture followed by papers and drips, followed by more paint/texture and layers. After a many hours spread over many days I finally finished.
 
 
Mary Anne Wangerin has a unique way of getting to her finished piece, click here to see her blog.
 
The aim Wanderlust is to experience new techniques, let go/embrace and create a project that maybe you wouldn't normally.
Hopefully I've achieved this weeks task.
 
Here are a few of the layers prior to the finished piece, not all of them as I got lost in the moment.


As  you can see nothing really stayed the same, I did have a dream catcher in mind when I began, but as I was taking so long I gave up on that idea. Maybe I will do another without the pressure of trying to get it done in a time limit.
 
Hope you like it.
 
Sue X