Wednesday, 25 January 2017

Tuesday Fun January 2017

The builders weren't on site yesterday and so I decided to have a bit of crafting time with the sister-in-law. 
 
Last week Nola and I popped to a local craft shop and collect a few supplies, we came back with an MDF window shape to decorate.

In my true style I didn't take many photos, ooops!
 
At this point we had sandwiched cheesecloth between the 2 pieces of shaped MDF, Structure medium was used to glue the fabric into folds to give the impression of curtains and the 2 MDF shapes were glued together.
 
 
Using a brayer, we added colour to all the MDF, covering the bottom lip if MDF which fit into the gap.

 
A layer of crackle glaze was followed by a coat of lighter chalk paint to give the window a distressed look. Distress ink was added to age even further. Water was misted onto the frame and lifted off to reveal a mottled effect, this was sealed with distress glaze/wax.

 
Close up!


To complete the project the window was slotted into the base and glued into position.
The fabric was painted in a light blue and white left to dry then dry brushed over the top with a darker blue.
The fairy was created from black texture paste on acetate which had been put through a stencil left to dry and cut out. The whole project was then assembled with moss and shop bought flowers and beads. However I think it needs something else!
 
Here is the finished piece!
 
 
That's it for today.
 
Sue X


Tuesday, 24 January 2017

Extention Part 1

 
Why Oh Why didn't we just move house!
 
Half of our lovely conservatory has been demolished.
 
 
Along with the garage.


Just waiting for the building inspector to check out the foundation holes before the next step.
 
Sue X


Wanderlust 2017-Week 3

Wanderlust Week 3 with Wilna Furstenberg was an experience in drawing directly to paper with acrylic  ink.
 
Yeah I can do that, not done it before but I'll give it a go. 
 
Normally I lightly draw with a pencil and then go over it with the chosen medium.
I have to admit I did pencil in a few flowers to go over, as I wasn't relaxed enough to go full hog straight off, however once I got into the flow there was no stopping me.


Acrylic paint was used to colour the pages, magenta, primary yellow, white followed by sap green and brown, all were mixed to achieve different combinations of shades and tones.


 The swirl was added to use up the excess magenta and white, I decided to keep it as a feature and incorporate an arty quote, love the idea of journaling on a page but its not really me. Black was added to make the colours pop, although at one point I thought is resembled a pattern found on a barge.
 
 
I chose the least soppy arty type words I could find on the internet to go in my swirl, then as I sat posting this I  thought OMG I have sunflowers on my page and totally obliviously added a quote by Vincent Van Gogh.
 
This is how the first part of my project turned out, white/black ink/paint was used to add detail to highlight and draw the eye into the page.
 
I'm unable to complete the 2nd and 3rd part this weeks lesson as the printer is out of ink, mainly due to number one daughter printing off several photos for observation support  for an art project.
 
Say no more!
 
Hope you like it.
 
Sue X


Thursday, 19 January 2017

Wanderlust Week 2 - Making Magic

Making Magic!
 
The aim of this weeks Wanderlust class was to let go, paint without inhibitions, not over think the process and continue building layers/texture until the picture reveals itself to you. The reveal being the magic, scary thought as I normally go with, "Stop before you over do it".
 
 I  watched the video and thought to myself, ok, I can do this.
 It was an extremely long recording showing many layers until the artist was happy/satisfied with the result. Having experienced the process of getting lost in the layers I now understand why the video is so long,  I began on the evening of Friday 13th and have only just finished it today, Thursday 19th.
 
 I began with paint/texture followed by papers and drips, followed by more paint/texture and layers. After a many hours spread over many days I finally finished.
 
 
Mary Anne Wangerin has a unique way of getting to her finished piece, click here to see her blog.
 
The aim Wanderlust is to experience new techniques, let go/embrace and create a project that maybe you wouldn't normally.
Hopefully I've achieved this weeks task.
 
Here are a few of the layers prior to the finished piece, not all of them as I got lost in the moment.


As  you can see nothing really stayed the same, I did have a dream catcher in mind when I began, but as I was taking so long I gave up on that idea. Maybe I will do another without the pressure of trying to get it done in a time limit.
 
Hope you like it.
 
Sue X

Saturday, 7 January 2017

A little fun!

Belated post, I'm afraid I found this in my drafts folder on blogger from a week before Christmas so I'm blogging it now because I thought it deserved to be  posted.

So Tuesday was a relax, have fun, get messy and go back to cards later today day, (I still have hand delivery cards to go).

So 10.30am arrived and I jumped in Nizzy (my car) and went to pick up Nola.
Now I knew she had bought some mini sledges and thought we would be spending the morning decorating them to hang on the tree, little did I know she had bought a couple of larger ones too

Oh joy!

 We began with a layer of blueberry paperartsy paint followed by a layer of crackle glaze then a top layer of white. We sat back had a cuppa and watched the magic happen.
I found some Xmas napkins with vintage pictures on buried deep in the depths of my craft box and so decided to decoupage them onto the sledge. They were 3ply tissues, after a few minutes spent separating the layers we tore around the image and manipulated it to fit on the project. Using soft mat gel applied thinly to the project with a finger then we gently lowered the image in place. This was smoothed over and left to dry, a layer of mat gel was  added over the top to protect and seal the image. Distress ink was added to the sled too.

I'd bought a packet of Tim Holtz skates, soooo cute, but only 6 of them or 3 pairs in a pack. This was the ideal charm to add to the project with a touch of ribbon to help secure them to and a touch more ribbon to form the rope  to steer with.


Out came the ready made flowers box and project complete.

 
This is my version.


This one is Nola's


Hope you like them.

Sue X


Wanderlust 2017

 Happy New Year!

It's been a busy old few months, birthdays, Christmas etc, etc, with more birthdays to come too (including my special one, wink, wink, nudge, nudge).
 
Hopefully I'll be able to get  a few crafting moments  this month (I'm not promising though), we're  having some alterations done to the house.  This includes underpinning then building over the garage and part of the conservatory, followed by creating an additional bathroom (having a couple of daughters means many bath time battles). I'd like to have a craft room but seeing as hubbys new job means he is working from home more, me thinks the spare small bedroom will become an office, come spare bedroom (a place to  go sleep when hubby's snoring becomes overbearing).

Moving on, hubby not only bought me a wallpaper stripper for Christmas, (I did really want one) but also a subscription to an online journaling course. You may of heard of it, Wanderlust 2017 check it out here.
 
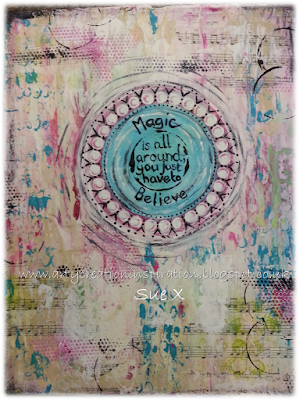
Obviously I can't share the content of what and how etc but here is my first page complete for week one which started on the 6th January and runs for 49 weeks, its not too late to join up if you fancy it.
 
Week 1 - Statement
 
 
Here are a few visual photos to help me remember how the page began.


My only problem was re-sizing the photo to load onto the gallery on Wanderlust, but thanks to an online video I found an alternative, quick easy way to change it to 600 x 800px, so apologies if my first photo file was er, too big and the wrong way round.
There's always one, normally me. LOL.
 
I have done art journaling before concentrating more on the art/texture and layering side, but tend not write much on the pages. So, hopefully this course will bring out the "journaling" side of the art journaling process, watch this space and we'll see how it goes.

That's all for now, happy January everyone!

Sue X