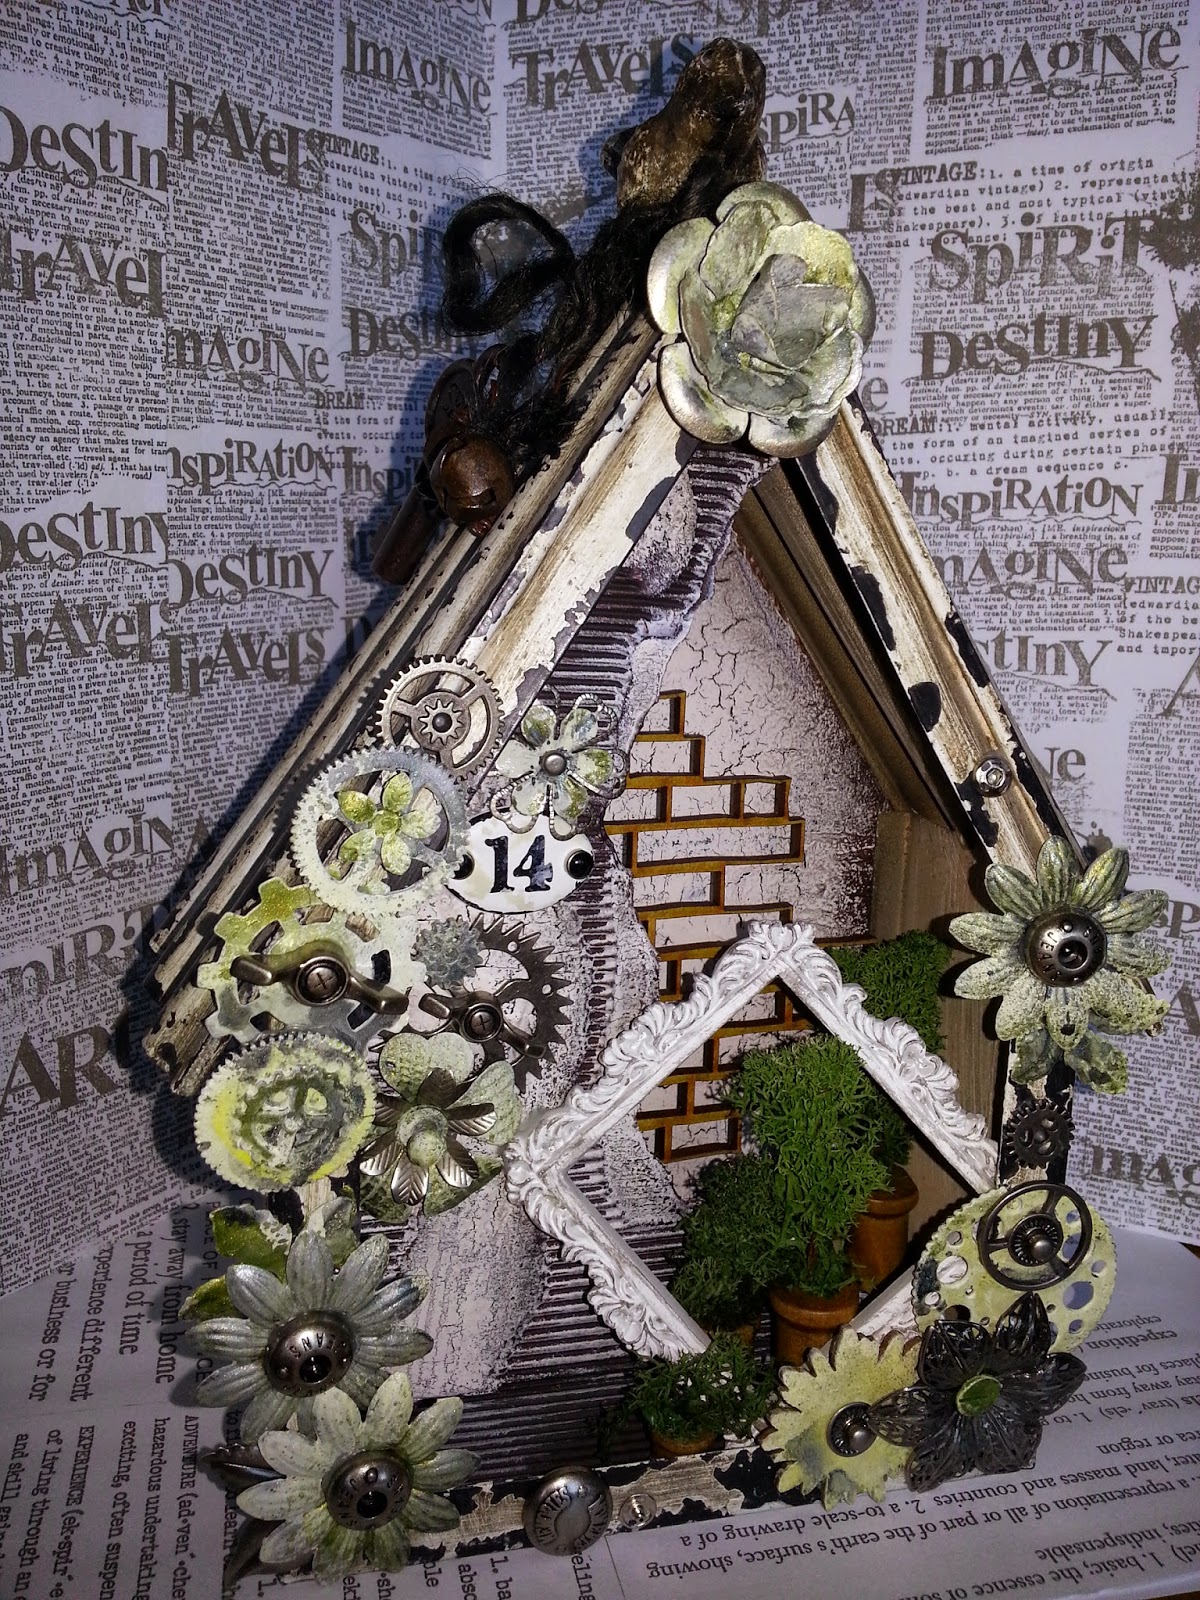
I saw a lovely bird house by Finnabar and I liked it so much, I bought one !!!
This is my finished version, details below tell you how.
I began by taking the back off for better access, then found some white corrugated card and used the back panel as a template to cut around. I tore a piece off to make an imitation broken down wall, then used the discarded card to overlay on top to create a smooth edge (crinkle edges together). I painted the whole card insert with French Roast Paperartsy paint followed by a coat of crackle glaze then a top layer of nougat paint. I sat back and watched the magic (crackle). Treasure gold wax in Onyxite and White Fire was added to the edges and the ridges of the card.
A few days later (shock, horror) I felt I wanted to alter the back panel too.
I used the original panel as a template again, this time using mount board for a solid base to work on. I used the same method as with the fake wall using French Roast, Nougat and crackle glaze then fixed it all into place.
The next bit was messy.
Most of the elements used were metal. I wanted to keep the metal tones to one colour (mostly silver/pewter) so I decided to paint the elements. To do this I used a Coat of gesso followed by a couple of coats of Honey Dew paint. Next I used Prima Bloom Sprays in Lime Wedge, Sunshine and Precious Stone to add colour. I do like these sprays they work well on paper or an absorbent surface,
however, I have found that they stay wet and sticky on metal embellishments even when blasted with a heat gun. It's been a few days now and the flowers are tacky (any advice to dry them would be
welcome).
I found a small frame hiding in my stash and a few fake cotton reels and decided to make them into a planting area "ish" with a bit of modellers fake tree greenery. All the bits and bobs were arranged and stuck into position. The twine on the top came attached to the house already and I felt I needed to use it. Using a bit of wire shaped and woven between the twine and couple of rusty bells, then a key added to complete the project.
Here are some more photos.


Hope you like my project.


No comments:
Post a Comment
Thanks so much for leaving a comment, I really enjoy reading every single one of them.
Along with everyone on Blogger I need to comply with the new Data Protection legislation (GDPR). Any comments left here are with your consent that your name & comment are visible to anyone who visits my blog and that you accept that your personal information is being used for that specific purpose.